ubuntu+wine+endnote
ubuntu下安装了Endnote,结果文献里的中文无法正常显示,乱码,甚至方块,group name也是无法显示,黑乎乎一片。
解决方法:
(1)发现,原来我的wine安装后配置程序的对话框中文都是方块,由于我没有拷贝中文字体到ubuntu下,所以直截了当删除注册表中的键值。
HKEY_LOCAL_MACHINE\Software\Microsoft\Windows NT\CurrentVersion\FontSubstitutes\MS Shell Dlg
HKEY_LOCAL_MACHINE\Software\Microsoft\Windows NT\CurrentVersion\FontSubstitutes\MS Shell Dlg2
wine的中文字体好了,但是endnote仍然不行
(2)将endnote中的edit->preference中的display font全都改为中文字体
文献的label显示好了,但是group name和文献内部字体仍然不行。
(3)将windows xp中的Riched20.dll拷贝到.wine/dosdevices/c:/Program Files/EndNote X3下,然后在wine配置中将riched20.dll替换,改为“内建优于原装”,OK.
vim+python
something zz from http://www.cnblogs.com/renrenqq/archive/2010/09/09/1813669.html
最近写python程序处理数据,发现还是vim好用,再说我的手指已经习惯了vim了。
于是按照上述网址配置,没有全部选择,只选用了其中的一部分。
(1)下载pydiction,解压后有4个文件,拷贝python_pydiction.vim和complete-dict到ftplugin目录,修改_vimrc
"Pydiction
let g:pydiction_location = 'C:\Program Files\Vim\vim73\ftplugin\complete-dict
(2)下载CTAGS,并解压到一个path路径能找到的地方。ctags -R可以手动对当前文件夹建立tags文件
(3)下载TagList,解压缩后是doc和plugin和两个目录,把这两个目录拷贝到你的Vim安装目录,配置
"TagList
let Tlist_Show_One_File=1
let Tlist_Exit_OnlyWindow=1
set tags= 可以指定tags
然后在Vim中执行:Tlist就可以打开TagList的窗口了
(4)下载winmanager,如上一个一样拷贝,配置
"WinManager
let g:winManagerWindowLayout='FileExplorer|TagList'
nmap wm :WMToggle<cr>
(5)下载minibufexploer,拷贝,配置
"MiniBufExplorer
let g:miniBufExplMapWindowNavVim = 1
let g:miniBufExplMapWindowNavArrows = 1
let g:miniBufExplMapCTabSwitchBufs = 1
let g:miniBufExplModSelTarget = 1
ubuntu 解压缩
.tar
解包:tar xvf FileName.tar
打包:tar cvf FileName.tar DirName
(注:tar是打包,不是压缩!)
---------------------------------------------
.gz
解压1:gunzip FileName.gz
解压2:gzip -d FileName.gz
压缩:gzip FileName
.tar.gz 和 .tgz
解压:tar zxvf FileName.tar.gz
压缩:tar zcvf FileName.tar.gz DirName
---------------------------------------------
.bz2
解压1:bzip2 -d FileName.bz2
解压2:bunzip2 FileName.bz2
压缩: bzip2 -z FileName
.tar.bz2
解压:tar jxvf FileName.tar.bz2
压缩:tar jcvf FileName.tar.bz2 DirName
---------------------------------------------
.bz
解压1:bzip2 -d FileName.bz
解压2:bunzip2 FileName.bz
压缩:未知
.tar.bz
解压:tar jxvf FileName.tar.bz
压缩:未知
---------------------------------------------
.Z
解压:uncompress FileName.Z
压缩:compress FileName
.tar.Z
解压:tar Zxvf FileName.tar.Z
压缩:tar Zcvf FileName.tar.Z DirName
---------------------------------------------
.zip
解压:unzip FileName.zip
压缩:zip FileName.zip DirName
---------------------------------------------
.rar
解压:rar x FileName.rar
压缩:rar a FileName.rar DirName
rar请到:http://www.rarsoft.com/download.htm 下载!
解压后请将rar_static拷贝到/usr/bin目录(其他由$PATH环境变量指定的目录也可以):
[root@www2 tmp]# cp rar_static /usr/bin/rar
---------------------------------------------
.lha
解压:lha -e FileName.lha
压缩:lha -a FileName.lha FileName
lha请到:http://www.infor.kanazawa-it.ac.jp/~ishii/lhaunix/下载!
>解压后请将lha拷贝到/usr/bin目录(其他由$PATH环境变量指定的目录也可以):
[root@www2 tmp]# cp lha /usr/bin/
---------------------------------------------
.rpm
解包:rpm2cpio FileName.rpm | cpio -div
---------------------------------------------
.deb
解包:ar p FileName.deb data.tar.gz | tar zxf -
---------------------------------------------
.tar .tgz .tar.gz .tar.Z .tar.bz .tar.bz2 .zip .cpio .rpm .deb .slp .arj .rar .ace .lha .lzh .lzx .lzs .arc .sda .sfx .lnx .zoo .cab .kar .cpt .pit .sit .sea
解压:sEx x FileName.*
压缩:sEx a FileName.* FileName
sEx只是调用相关程序,本身并无压缩、解压功能,请注意!
sEx请到: http://sourceforge.net/projects/sex下载!
解压后请将sEx拷贝到/usr/bin目录(其他由$PATH环境变量指定的目录也可以):
[root@www2 tmp]# cp sEx /usr/bin/
monet+xquery in ubuntu 10.04
Create a file /etc/apt/sources.list.d/monetdb.list with the following contents (replacing "karmic" as needed with "lenny", "lucid" or "maverick"):
deb http://dev.monetdb.org/downloads/deb/ karmic monetdb
deb-src http://dev.monetdb.org/downloads/deb/ karmic monetdb
ubuntu 10.04: use "lucid" to replace "karmic"
wget --output-document=- http://dev.monetdb.org/downloads/MonetDB-GPG-KEY | apt-key add -
sudo apt-get update
sudo apt-get install monetdb-xquery monetdb-client
sudo usermod -a -G monetdb $USER
使用:
启动server:Mserver --dbinit="module(pathfinder);"
启动clinet:mclient -lx
latex-公式例子-加粗-括号
\documentclass{article}
\pagestyle{empty}
\setcounter{page}{6}
\setlength\textwidth{87.0pt}
% Special setting to make delimiters always grow in this example
\setlength\delimitershortfall{-3pt}
\usepackage{bm}
\begin{document}
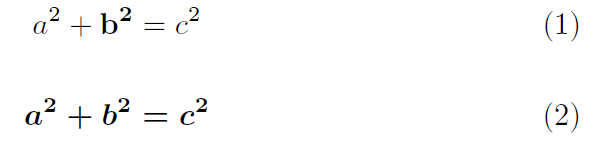
\begin{equation}
a^2+\mathbf{b^2}=c^2
\end{equation}
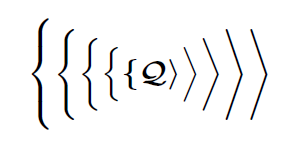
$\bm{\Biggl\lbrace\biggl\lbrace\Bigl\lbrace\bigl\lbrace \lbrace
\mathcal{Q}
\rangle \bigr\rangle\Bigr\rangle\biggr\rangle\Biggr\rangle}$
\mathversion{bold}
\begin{equation}
a^2+b^2=c^2
\end{equation}
\end{document}
2010.10.27